Texturing metal surfaces in jewelry
A texture changes how light moves across a piece. There are many ways to create one, from the most rustic to the most precise.
With a hammer #
Ball, flat-faced or chisel hammers leave regular or irregular marks. Hammering also hardens the metal.
By rolling #
Passing a sheet of metal through the rolling mill with paper, fabric, leaves or engraved plate transfers the pattern to the surface.
Bark texture #
The surface is heated until it almost melts and then cooled, leaving a tree-bark look.
With burs and stamping #
Burs and punches leave controlled marks. Sandblasting or bead blasting gives an even matte finish.
Step by step #
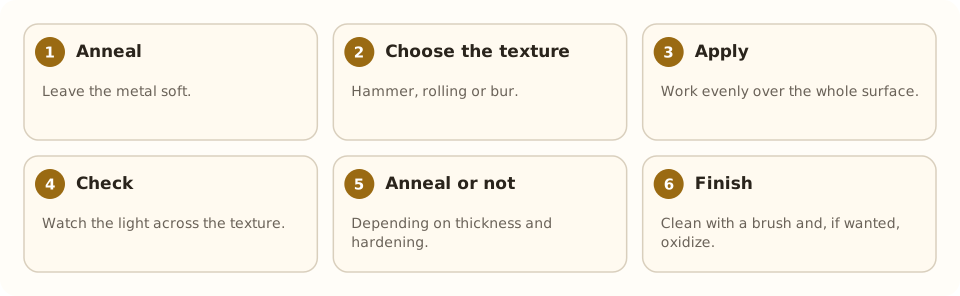
- Anneal. Leave the metal soft.
- Choose the texture. Hammer, rolling or bur.
- Apply. Work evenly over the whole surface.
- Check. Watch the light across the texture.
- Anneal or not. Depending on thickness and hardening.
- Finish. Clean with a brush and, if wanted, oxidize.
Tools and materials #
- Ball-peen and texturing hammers
- Rolling mill with paper or fabric
- Burs and brushes
- Oxidizers (coloring)
Common mistakes #
- Very deep textures on thin sheet.
- Applying the texture unevenly.
- Polishing and erasing the texture by mistake.
- Forgetting the thickness that is lost.
See also #
This entry was drafted with the help of AI and is pending review by the author.
Related articles
 Techniques
Pavé setting
Pavé covers a metal surface with many small stones held by tiny beads of metal, as if “paved”; it gives continuous sparkle.
 Techniques
Burnishing: smoothing without removing metal
Burnishing smooths and shines metal by rubbing it with a polished steel tool, without removing material; used on bezels, prongs and as a final finish.
 Techniques
Metal clay (PMC)
Metal clay mixes silver or gold powder with a binder; it is hand-modeled and fired into solid metal. A modern, accessible technique.