Finishes: matte, satin, brushed and hammered
The finish is the final texture of the surface. It defines how the jewel looks and feels, and hides or highlights scratches.
High polish #
A mirror finish, almost reflective. It shows scratches easily.
Satin and brushed #
Achieved with steel wool, brushes or sandpaper in one direction; it gives fine lines and a soft shine that hides scratches.
Matte and blasted #
Sandblasting or bead blasting leaves an opaque, even surface with no shine.
Hammered #
Small hammer facets that reflect light irregularly.
Antiqued and oxidized #
A dark patina in the recesses to highlight relief (see coloring of metals).
Step by step #
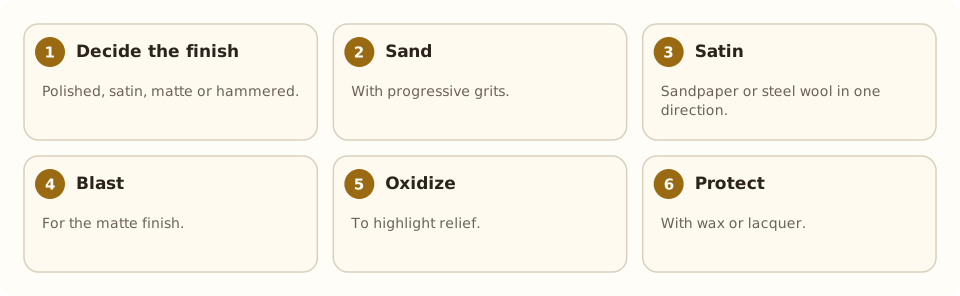
- Decide the finish. Polished, satin, matte or hammered.
- Sand. With progressive grits.
- Satin. Sandpaper or steel wool in one direction.
- Blast. For the matte finish.
- Oxidize. To highlight relief.
- Protect. With wax or lacquer.
Tools and materials #
- Sandpaper and steel wool
- Brass or steel brushes
- Sandblaster or glass beads
- Patinas and waxes
Common mistakes #
- Changing direction when satin-finishing.
- Blasting without protecting stones.
- Mixing grits when sanding.
- Forgetting to protect a patina.
See also #
This entry was drafted with the help of AI and is pending review by the author.
Related articles
 Techniques
Pavé setting
Pavé covers a metal surface with many small stones held by tiny beads of metal, as if “paved”; it gives continuous sparkle.
 Techniques
Burnishing: smoothing without removing metal
Burnishing smooths and shines metal by rubbing it with a polished steel tool, without removing material; used on bezels, prongs and as a final finish.
 Techniques
Metal clay (PMC)
Metal clay mixes silver or gold powder with a binder; it is hand-modeled and fired into solid metal. A modern, accessible technique.