Gilding: fire, leaf and electrogilding
To gild is to cover a metal with a layer of gold. There are historic and modern techniques, with different thickness, cost and safety.
Fire gilding #
An amalgam of gold and mercury was spread over the piece and heated to evaporate the mercury. It left a very durable layer, but mercury vapors are toxic: today it is banned or heavily restricted and almost unused.
Gold leaf #
Very thin sheets of gold are stuck on with a mordant and burnished. It is the classic technique for gilding frames, sculptures and manuscripts.
Electrogilding #
The most widespread today: a layer of gold is deposited with electricity in a bath (see electroplating). Its thickness runs from tenths of a micron to several microns.
Depletion gilding #
In gold-copper alloys (tumbaga), copper is removed from the surface so a layer of pure gold remains. It was used by Andean and Colombian peoples.
Choosing #
To see the difference between plated, filled and vermeil, see the guide to plating and vermeil.
Step by step #
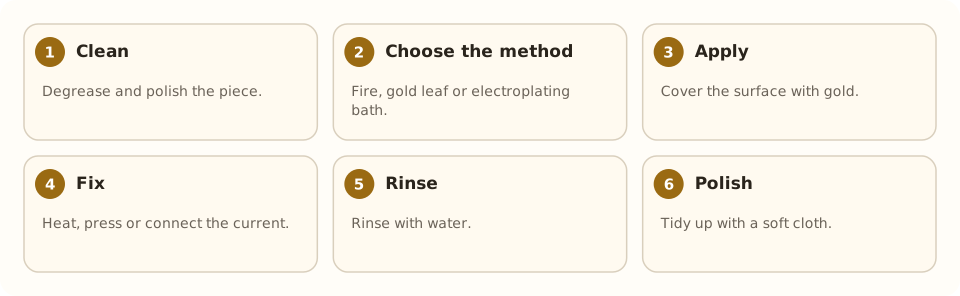
- Clean. Degrease and polish the piece.
- Choose the method. Fire, gold leaf or electroplating bath.
- Apply. Cover the surface with gold.
- Fix. Heat, press or connect the current.
- Rinse. Rinse with water.
- Polish. Tidy up with a soft cloth.
Tools and materials #
- Gold leaf or plating bath (electroplating)
- Tank and rectifier (plating method)
- Polishing cloth
- Gloves and ventilation
Common mistakes #
- Dirty surface: the gold does not take.
- A thin layer that wears away soon.
- Mixing the bath's substances.
- Touching the piece with fingers after cleaning.
See also #
This entry was drafted with the help of AI and is pending review by the author.
Related articles
 Techniques
Pavé setting
Pavé covers a metal surface with many small stones held by tiny beads of metal, as if “paved”; it gives continuous sparkle.
 Techniques
Burnishing: smoothing without removing metal
Burnishing smooths and shines metal by rubbing it with a polished steel tool, without removing material; used on bezels, prongs and as a final finish.
 Techniques
Metal clay (PMC)
Metal clay mixes silver or gold powder with a binder; it is hand-modeled and fired into solid metal. A modern, accessible technique.