Etching and photo-etching

In etching, you draw with a protective resist that withstands the acid, and the bath corrodes only what is left exposed. The result is a design cut into the metal.
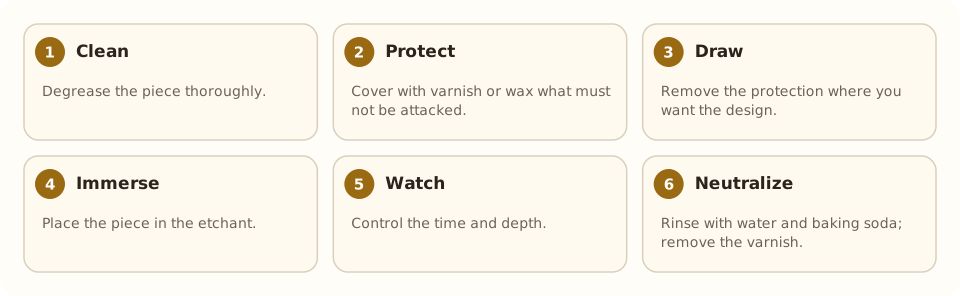
Steps #
- Clean and degrease the metal.
- Protect it with a resist (varnish, wax, vinyl or photosensitive film), leaving the design exposed.
- Immerse the piece in the etching bath.
- Neutralize, remove the resist and clean.
Etchants #
Ferric chloride is used for copper and brass; silver and steel use other, more dangerous acids. Electro-etching, with electric current and a salt solution, is a safer alternative.
Photo-etching #
A photosensitive film and a printed mask allow very fine drawings and lettering to be reproduced with photographic precision.
Safety #
Work with gloves, glasses and good ventilation, and neutralize acid waste and dispose of it according to regulations.
Step by step #
- Clean. Degrease the piece thoroughly.
- Protect. Cover with varnish or wax what must not be attacked.
- Draw. Remove the protection where you want the design.
- Immerse. Place the piece in the etchant.
- Watch. Control the time and depth.
- Neutralize. Rinse with water and baking soda; remove the varnish.
Tools and materials #
- Etchant (ferric chloride or diluted nitric acid)
- Protective varnish, wax or resist
- Plastic or glass container
- Gloves, glasses and ventilation
Common mistakes #
- Leaving the piece too long: detail is lost.
- Grease on the surface: the etchant acts unevenly.
- Mixing acids without knowledge.
- Pouring the etchant down the drain.
See also #
This entry was drafted with the help of AI and is pending review by the author.
Related articles
 Techniques
Pavé setting
Pavé covers a metal surface with many small stones held by tiny beads of metal, as if “paved”; it gives continuous sparkle.
 Techniques
Burnishing: smoothing without removing metal
Burnishing smooths and shines metal by rubbing it with a polished steel tool, without removing material; used on bezels, prongs and as a final finish.
 Techniques
Metal clay (PMC)
Metal clay mixes silver or gold powder with a binder; it is hand-modeled and fired into solid metal. A modern, accessible technique.