Carving bone, antler, shell and tagua

Hard organic materials are carved with saws, files, burs and gravers. They give light pieces with a great variety of looks.
Materials #
Bone, antler, shell, tagua, mother-of-pearl and jet. See bone and ivory and horn and antler.
Techniques #
Openwork, relief, line engraving, cameos and scrimshaw (ink engraving on bone or similar material).
Finish #
It is sanded and polished; dyed with natural dyes or oiled.
Ethics and legality #
Avoid elephant ivory and tortoiseshell, and check the origin of antler, shell and coral.
Step by step #
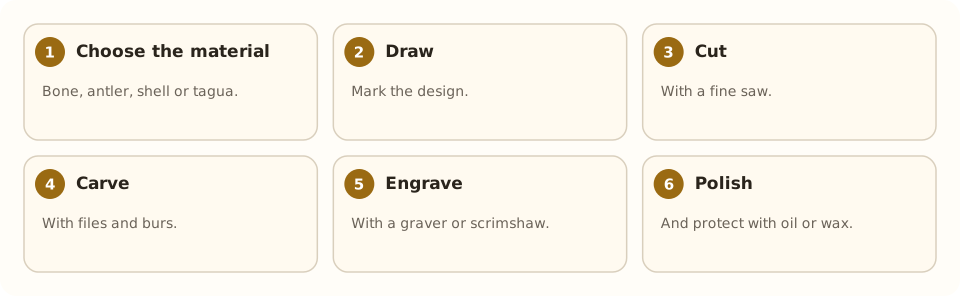
- Choose the material. Bone, antler, shell or tagua.
- Draw. Mark the design.
- Cut. With a fine saw.
- Carve. With files and burs.
- Engrave. With a graver or scrimshaw.
- Polish. And protect with oil or wax.
Tools and materials #
- Saw, files and burs
- Gravers
- Scrimshaw ink
- Dust mask
Common mistakes #
- Heating the material when milling: it burns.
- Cutting against the grain.
- Using protected materials.
- Breathing dust without a mask.
See also #
This entry was drafted with the help of AI and is pending review by the author.
Related articles
 Techniques
Pavé setting
Pavé covers a metal surface with many small stones held by tiny beads of metal, as if “paved”; it gives continuous sparkle.
 Techniques
Burnishing: smoothing without removing metal
Burnishing smooths and shines metal by rubbing it with a polished steel tool, without removing material; used on bezels, prongs and as a final finish.
 Techniques
Metal clay (PMC)
Metal clay mixes silver or gold powder with a binder; it is hand-modeled and fired into solid metal. A modern, accessible technique.